Setup
- Create a new software instrument track.
- In the Inspector, select Drum Machine Designer.
- Right-click in the right area and create a Pattern Region.
- Open Drum Machine Designer and drag a sample into it.
Now we can compare using Drum Machine Designer to using the raw sample.

Making Raw Samples and DMD Samples Match
From the video linked in the Resources section, Chris starts by answering whether there’s a difference between raw samples and using them in Drum Machine Designer with:
“Not really, no… kinda!”
But in reality, there is a difference!
They go on to explain that samples imported into Drum Machine Designer are significantly lower in decibel level. In the example, the raw sample was hitting around 0 dB, whereas after being imported into Drum Machine Designer, it was hitting around -8 dB.
Take a look at the picture below:
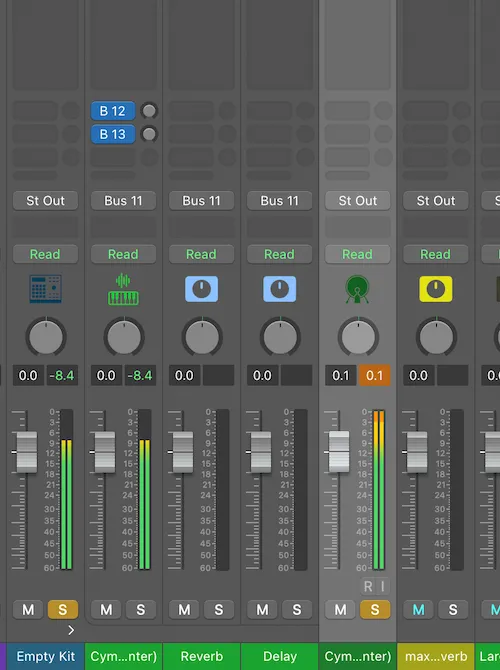
The kick sample I imported from a sample pack is hitting 0.1 dB, while the same sample dragged into Drum Machine Designer is only hitting -8.4 dB!
Last I checked, that’s a big difference.
So, how do we fix this? Here’s how:
- Open Drum Machine Designer.
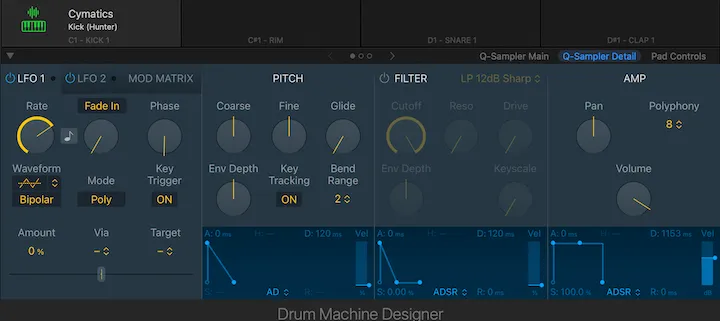
- Go to the Q-Sampler Detail page.
- Set the Volume knob in the Amp section to
0(you can reset it quickly withOption+Click). - In the Filter section, turn off the filter.
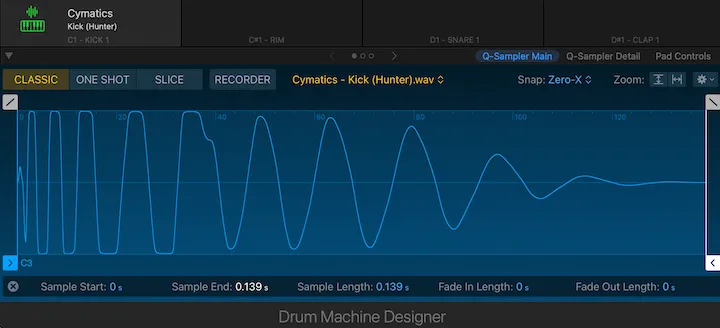
- Go to the Q-Sampler Main page:
- Sometimes Q-Sampler trims the sample, so drag it out fully.
- Open the Step Sequencer and set the velocity of every note to
127(full velocity).
(Click and drag up on the arrow to increase velocity.)

To double-check, set the raw sample and the Drum Machine Designer version to opposite polarities, open a MultiMeter on the Stereo Out, and check the Goniometer in the MultiMeter with a large upper and lower range.
Note: If you drag a sample from Finder or the Files app, you can skip the Q-Sampler Main Page step, because it won’t have extra space at the end of the sample.
Conclusion
Using the Step Sequencer lets you build beats faster. Hopefully, this clears up how to use Drum Machine Designer effectively.